Thursday, November 6, 2014

Mr. Tickles and Noel

Mr. Tickles, my blue Beta fish had his water changed today.  Now that might not seem like a challenge for most people but I consider it a major challenge to keep Mr. Tickles alive.  I'm not good with fish. This tank is a good thing I think.  You don't have to remove the fish or any of the rocks etc.  All you do is add more water and then as the water in the tank rise up they go through the overflow pipe/filter.  It worked pretty good.


As you can see it did catch some of the debris and pushed it out of the tank.  There isn't much since there is only one fish and it hasn't been a week in there.

That chore being taken care of, I went back to work again on the Noel block.  I had to stop working on it since I ran out of the Perle Cotton.  I have it on order so it won't be long before I'm back working on it again.


What is everybody working on?


Sunday, November 2, 2014

Christmas Stocking

I forgot to post this before so just though I'd do yet another blog post.  This month in The Quilt Pattern Magazine, is how to do some Christmas stocking (mini).  I was one of them that did the test pattern so I couldn't show it until November.  Here it is.  :)


Hope you enjoy it.

Mr. Tickles

I bought myself a male Beta fish today.  He's blue and in a neat tank.  The tank empties itself and cleans itself (if you believe the advertising) by adding water to it.  Then the old water goes out through the overspout.

His name is Mr. Tickles aka Tickles aka Tick because of his blue cover and there was a cartoon called the Tick.  Superhero (although dumb) who used the word SPOOON as his cry into battle.  Since my nephew and his wife was with me and we went through Wendy's to get a frosty, the word spoon came up since my nephew was holding the spoons we had to cry SPOOON.

Jason wanted to name it Fishy which wasn't going to be.  So in honor of the Blue Tick and spoons everywhere....It is Mr. Tickles or Tick for short.


Redwork Bell

My Noel block is still at the office so I had to work on the bell one.  Here it is.


The back of it looks very similar.  I tried to make sure that I wound my tailing threads in and to travel from one spot to another.  It helps out.  :)


Friday, October 31, 2014

What to do...and stained glass method

 What do you do when you leave your Redwork project at work and you know it needs to be finished soon?  You start another one.  Yes that is right.  I left my NOEL Redwork project at work.


So now that I needed something to work on, I decided that my block exchange can have TWO Redwork patterns.  The other one I started at home and is a bell.


I know it's hard to see the pattern but it will come along and be easier to see later.  I will work on the bell at home and then the NOEL at work during lunch hours.  Perhaps they both will be done sooner than I anticipate.

Remember the bucket list drawings?  Redwork is Octobers so I am fitting right in with that.  November is Stained Glass so I pulled out my stained glass test pattern that I did for The Quilt Pattern Magazine to put here.

It was nice to work on and I'll probably use that technique again.  You did all your piecing and quilting (as in Free Motion Quilting) BEFORE you added the black leading to it.  The black leading (or whatever color you are using) hides the raw seams of your applique, etc.

Here is a picture of the finished project.


Never having done Stained Glass before it was a little different.  I think that when I do another one, I'll make skinnier leading (or buy pre made binding) if my design has small spaces.


Thursday, October 30, 2014

Redwork coming along! YAY!

I do love to work on redwork.  It is relaxing once I can get started.  I am really liking how this is turning out.  Took it to work and did about 30 minutes on it.  Tonight I hope to get some more work on it done.  I'll have to find a movie to watch or turn on the TV and just sit and work.  In reality I'll probably be stitching at the computer again.  LOL.  Both the TV and the computer are addicting.


I'll be posting more progress shots so just stop back to keep up to date.  I hope everybody has a great day/night.


Tuesday, October 28, 2014

two blocks done

Finished up a couple of blocks so now I can start on the six blocks that I need for my Christmas block exchange.  They need to be done by Thanksgiving.  First up are my two finished blocks that will go into quilts for other people.


This first one is just a regular one which went together pretty normal like.


 This one, however, is the one that I had cut wrong when squaring up the block.  So I cut it off and turned it under a little bit, and appliqued IT on another block.  So I appliqued the applique block.  LOL.

I got paranoid when it came to square it up so I took my blue water soluble marking pen and drew around my squaring up template.


I ripped up some fabric so I can use it for the redwork and it is a white on white.  It seemed like dust or something flew off when I ripped it so I decided I had better wash it first.  I'm not sure if the dye on it or it was just dusty or what.  So off to the kitchen sink to wash the little bit that I wanted to use.  I'll mark that fabric as a "wash first" fabric.

Now my question for you is if you think I need to enlarge the design on the block?  It is for a 12 1/2" block.  The design as shown here is would result with around 2 1/4" white space around the design.

What do you think.


Golden trees

I think I will finish my Angel block tonight but in the meantime I thought I'd post two pictures that I took this morning.  While waiting for my ride to pick me up to go to work, I noticed my neighbors tree.  I loved how it looked.  It will probably only stay that way for a few days at the most.

This was taken first but then I took another one where it could be lightened up a bit.

The picture slightly lightened but not much and taken 5 minutes later

Now back to work.  LOL.


Monday, October 27, 2014

New redwork

Did I tell you that I signed up for a Christmas themed block swap?  I need to get 6 blocks (12 1/2") done by Thanksgiving.  If I want to do a round two then it is early December for another set of 6.  It is being done by one of my facebook groups.  I will do at least the first six.  Knowing me it will be applique but then I thought why not redwork.  I asked the group if anybody likes redwork because I'm not doing the work if nobody likes it and there was one response in the affirmative (no negative) so I will make at least one block redwork.  This is the design that I'm thinking of.


The other blocks will be some of Fat Cat Patterns (free ones) which show a Mr. Snowman, Mrs. Snowman and a cute Santa Claus.  A roly poly santa.  :)

What do you think?

Sunday, October 26, 2014

What a day....of Oops and Mom pictures

Ever had one of "those" days?  Of course you have.  Today started out nice but then the oops snuck up on me.  But first let me tell you the good stuff.  Kerm, my brother, called and said it was his week to bring breakfast (and me) to mom for Sunday Breakfast.  YAY!  I get a week off.  Always love that.

 While I was waiting for him to pick me up, I took my camera and snapped some shots of the trees and stuff around my block.


 Nice start right?  So off to McDonald's we go.  We didn't get everything we ordered but enough for breakfast (and mom's hot picante sauce) and I called up when I got home so they will replace what was left out next time.  I think it is funny that they got the 16 packets of hot picante sauce right but left out two regular sausage burritos.  Oh well.

So we got to mom's and I had taken her a new wall hanging.  It was in oranges so it was more seasonal.  She decided that the Fourth of July Flag that she had help to make (with Activities Dept) could go home with me so I could put up her new wall hanging.


Since Kerm was there and semi laughing at me hanging up her wall hanging, I snuck a picture of him with mom also.  Mom is one of these "move it" but doesn't tell you which direction or how far type of people.


He was so busy tell mom to smile that he didn't notice that I got him in the picture too.  SCORE!

So I came home feeling pretty good about what I had accomplished this morning and then it went down hill from there.

I left my angel block at work so couldn't work on her.


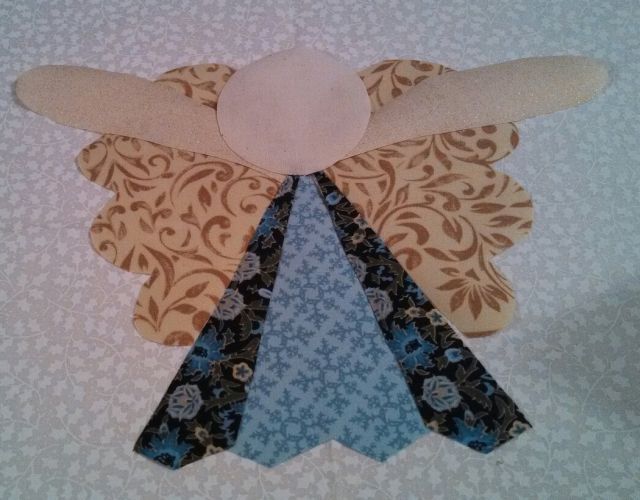
Instead I found some more fabric and decided to do another one because I really wanted to get it done and in the mail.  Angel number two colors were:


Not bad.  I made a lot of good progress on her last night and I knew that I could finish it this morning.  Or so I thought...

Managed to finish it and then I went to square it up since I cut my background fabric larger than needed so I don't have to worry if the fabric shrinks a little bit due to hand stitching.

Ummmm.  Somewhere in my squaring up, I started to cut a side that I had already cut.  Yeah, you got it.  Can't use it now.  I even drew a line up on it with my water soluable pen to double check before throwing it out.


Disgusted with myself, I decided I wouldn't let it get to me so I pulled out something else to work on.  Remember the fold and sew method I talked about yesterday?  I did it with some blue jean squares I have had for ages.  They are approximately 8" so I cut my center at 4" and away I went.


If you saw this in person you'd see that there is a VERY slight difference in the red sashings because I ran out and pulled out another red.  That is when I saw that the blocks didn't line up right.  That spoiled it for me.  I'm done with it.  Won't even put a back on it.  Terrible isn't it?

Bound to rescue something today, I pulled out the purple angel block again.  I cut it out from the backing and now I'm in the middle of turning back the white background (thank you Elmer's School Glue).  I will turn it into an applique for something sometime.


Dare I try to do something else today?  I don't know.  I have some fused pieces that are only partially sewn on.  perhaps I will pick one of those up.

Wish me luck!


Saturday, October 25, 2014

Fold and Sew Technique by Peg Spradlin

Ready for a nifty trick for a square within a square?  I saw this technique on a video from National Quilter's Circle (I am a premium subscriber so I had access to it).  It's too good not to share how to do it.  It is from Peg Spradlin.  Ready?  It took me 2 minutes to make this block with no cutting.  I say no cutting because I used a spare layer cake square and a spare charm pack square.  Ready?  Here we go.

Lay your 5" square in the middle of your 10" square.


Fold over two sides so they meet in the middle.  I put a pin in the middle of my 5" square to keep it in place.  I would imagine if you're careful you don't need to or you could put a little bit of washable glue to keep it there.


Press the two folded sides so it lays nice.  Take it to your sewing machine and sew 1/4" down each side.


Do the usual.  Set your seam (if you usually do that) and then press open your block.


Ready for the next part?  You repeat for the other two sides.  In this case the top and bottom.  Notice in the above picture you have two raw edges.  Not for much longer!


Fold the top and bottom in together and take it to the sewing machine and stitch.


Take it to the ironing board (or wherever) and set seams and press open.


It took me only a couple of minutes to have my square within a square block.  Sweet!

Ok.  On the down side is that you have what looks like cornerstone blocks in the corners since you are sewing all the way down.  I'm thinking that perhaps you could modify this technique a bit and mark your start and stop points by the 5" squares.  It would be a partial seam then but you wouldn't have the cornerstone affect.  Not sure if that would work.  Having the extra seams that show going all the way up and down the block don't bug me.  That's me.  If it bugs you, you might not want to do this.

This technique would also work with rectangles, etc.  Try it and see if you like it.


CATCH-UP DAY

    Notice that  said catch up and not ketchup?  Although a ketchup day sounds like it could be fun.   This will be a short post since my ba...